
Helpers and tips for npm run scripts
»Tooling«
Tooling, npm scripts, helpers, cli, tips, watch
The purpose of this blog post is not to introduce using npm as a build tool. There are lots of good articles about the »where« and »why«. I would like to present some hidden gems to potentially improve your setup instead.
I’d like to point to Why npm Scripts? if you want to read an introduction to the benefits of using CLI tools via npm scripts in favor of a task runner like Gulp and their plugin eco system.
Introduction
You can easily run scripts using npm by adding them to the "scripts" field in package.json and run them with npm run <script-name>. Run npm run to see available scripts. Binaries of locally install packages are made available in the PATH, so you can run them by name instead of pointing to node_modules/.bin/name.
{
	"name": "my-package",
	"scripts": {
		"lint": "eslint ."
	},
	"devDependencies": {
		"eslint": "^4.19.0"
	}
}
$ npm run lint
Lifecycle scripts
npm comes with predefined lifecyle scripts which are excuted under specific conditions when they are defined in your package.json.
{
  "name": "my-package",
  "scripts": {
    "prepublishOnly": "nsp check"
  },
  "devDependencies": {
    "nsp": "^3.2.1"
  }
}
This will be executed automatically before your npm package is published to the registry via npm publish to check for known vulnerabilties in your dependencies.
Note: prepublishOnly is available since npm v4.0.0. See npm docs.
»npm start« and »npm test«
These are also lifecycle scripts (but aren’t executed automatically).
{
  "name": "my-package",
  "scripts": {
    "start": "node server.js",
    "test": "jest"
  },
  "devDependencies": {
    "jest-cli": "^22.4.2"
  }
}
Therefore they can be executed simply with:
$ npm test
$ npm start
»pre« and »post« scripts
»pre« and »post« scripts are special lifecycle scripts which can be used to run scripts automatically in sequence.
{
  "name": "my-package",
  "scripts": {
    "pretest": "eslint .",
    "test": "jest"
  },
  "devDependencies": {
    "eslint": "^4.19.0",
    "jest-cli": "^22.4.2"
  }
}
$ npm test
This will lint your files before running your tests. The tests will not run if linting fails, or more generally: the following script won’t be executed if one of the scripts running in sequence exits with an exit code other than 0.
Note: »pre« and »post« scripts can also be used for your custom npm scripts. So npm run foo will also run prefoo and postfoo if defined.
Options for npm scripts
Passing options to used commands
You can pass options to the command you are using in your npm script by adding -- --flag like in the example below.
{
  "name": "my-package",
  "scripts": {
    "lint": "xo",
    "lint:fix": "npm run lint -- --fix",
  }
}
Adding the -- --fix option is like executing xo --fix.
Silent option
npm run has a --silent option which is especially useful when combining npm scripts in npm scripts.
Imagine you have a setup for linting your JavaScript files like the following:
{
  "name": "my-package",
  "scripts": {
    "lint": "xo",
    "lint:fix": "npm run lint --silent -- --fix",
  }
}
Using the –silent option reduces the output in the Terminal. See this comparison.
Helper packages
Watch tasks
There are several packages which enable running scripts when files changed. Personally, onchange offers the best combination of ease of use and flexibility.
{
	"name": "my-package",
	"scripts": {
		"lint": "eslint src",
    "lint:watch": "onchange \"src/**/*.js\" -- npm run lint --silent"
	}
}
So npm run lint:watch will watch for changes in the file system and will automatically run eslint when a file changes.
Get notified in error cases
cli-error-notifier sends native desktop notifications when npm scripts fail.
{
  "scripts": {
    "lint": "onerror \"eslint src\"",
  }
}
This is especially useful for watching files while developing in conjunction with onchange.
{
  "scripts": {
    "lint": "eslint src",
    "lint:fix": "npm run lint --silent -- --fix",
    "lint:watch": "onchange \"src/**/*.js\" -- onerror \"npm run lint --silent\""
  }
}
Run multiple scripts in parallel or serial
Using npm-run-all offers the following advantages:
-
can increase readability of the scripts section in your package.json via glob-like patterns
Before:npm run clean && npm run build:css && npm run build:js && npm run build:htmlAfter:
npm-run-all clean build:* -
compared to using
npm run foo & npm run bar- running scripts in parallel works on Windows
- multiple scripts which are listening to file changes can run parallel
{
  "scripts": {
    "start": "npm-run-all clean --parallel webpack:server lint:watch",
    "build": "npm-run-all security test clean webpack",
  }
}
Remembering npm run scripts
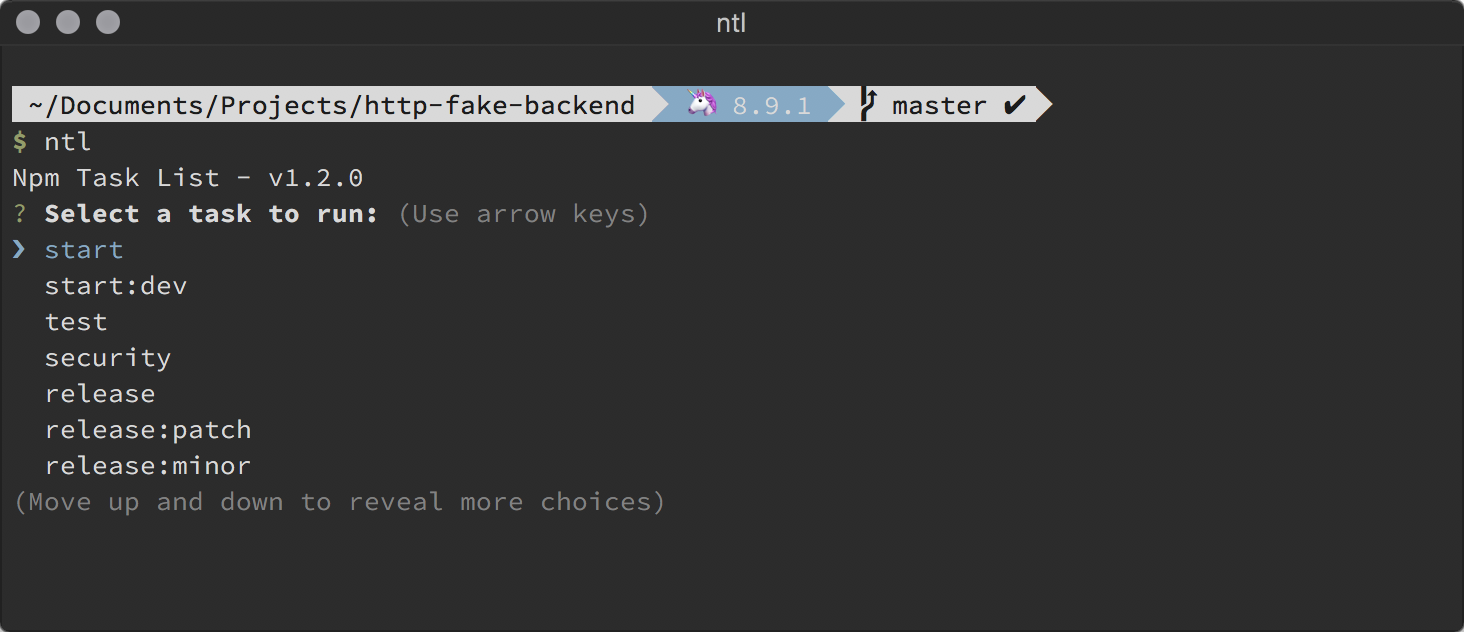
Depending on the amount of tasks it might be hard to remember each and every task name. A faster alternative to use npm run to list all available tasks is to use an awesome little helper tool called ntl to show an interactive list of task to choose from 💥
Beyond npm scripts
Wrap your npm scripts setup to improve maintainibility and user experience
There are two things which might have a downside when your setup becomes more and more complex:
- Not being able to describe your tasks to your users.
- You might want to upvote this issue on the npm issues tracker to fix this.
- The lack of using comments in package.json.
As workaround for both you can use a tool like nps which claims to have »all the benefits of npm scripts without the cost of a bloated package.json and limits of json«.
The solution of nps
It allows you to move your scripts to a package-scripts.js file. Because this file is a JavaScript file, you can do a lot more with your project scripts.
const npsUtils = require('nps-utils') // not required, but handy!

module.exports = {
  scripts: {
    default: 'node index.js',
    lint: 'eslint .',
    test: {
      default: 'jest',
      watch: {
        script: 'jest --watch',
        description: 'run in the amazingly intelligent Jest watch mode'
      }
    },
    build: {
      default: 'webpack',
      prod: 'webpack -p',
    },
    // learn more about npsUtils here: https://npm.im/nps-utils
    validate: npsUtils.concurrent.nps('lint', 'test', 'build'),
  },
}
Using npx with locally installed dependencies instead of npm run scripts
npm comes bundled with npx (since v5.2.0) — a tool to execute package binaries which is great to use packages globally without the need to install them globally.
But it’s also pretty useful for locally installed dependencies in your project.
Each command called with npx is executed either from the local node_modules/.bin directory, or from a central cache, installing any packages needed in order to run a command.
{
	"name": "my-package",
	"scripts": {
		"lint": "xo"
	},
	"devDependencies": {
		"xo": "^0.20.0"
	}
}
npx xo --fix
This executes the locally installed version of XO from node_modules/.bin.
That’s it for now. Please share other features, tips and tools I might have missed.
Related posts
- Stencil and Storybook – How to generate argTypes from JSDoc comments
- How to flash ESP8266 (and ESP32) to use Espruino firmware on macOS
- JSConf Budapest 2017 – A personal recap
Comments
Comments are removed for now. Feel free to contact me via Twitter in case you’d like to talk about this blog post: @mkuehnel.